REVIEW · EDINBURGH
From Edinburgh: Loch Lomond, Stirling Castle & The Kelpies
Book on GetYourGuide →Operated by Haggis Adventures · Bookable on GetYourGuide
You’ll start with a steel horse that grabs you fast. This Edinburgh day trip strings together three big-hitters: The Kelpies, Loch Lomond, and Stirling Castle, all with a live guide and downloadable audio.
I really like how the stops are spaced so you get quick impact at the famous sights, then time to breathe in the views around Loch Lomond. I also like that you’re not stuck staring out the window the whole day; the itinerary gives you a proper photo moment, a walkable village break, and a castle visit with time to roam.
One thing to consider: the tour runs on an English live guide, and the timing at Loch Lomond can feel tight if you’re hoping to do longer exploring on foot.
In This Review
- Key Things to Know Before You Go
- From Edinburgh to The Kelpies: 30 Metres of Steel Horses
- Balmaha and Ben Lomond Views: A Quick Loch Lomond Reset
- Stirling Town Time: Where You Can Set Your Own Pace
- Stirling Castle: Royal Drama and Wars of Independence Stories
- Guide, Audio Guides, and Coach Comfort on a Long Day
- Price and Value: What $55 Gets You (and What It Doesn’t)
- Timing and Order: The Day Moves Fast, So Plan Smart
- Who This Tour Suits Best (and Who Should Skip It)
- Should You Book This Edinburgh to Kelpies, Loch Lomond, and Stirling Castle Tour?
- FAQ
- How long is the tour?
- Where does the tour start and what time should I arrive?
- Are entrance fees included?
- Is transportation included?
- Are audio guides included, and what languages are available?
- Do I need to bring a lunch?
- Is hotel pickup and drop-off included?
Key Things to Know Before You Go
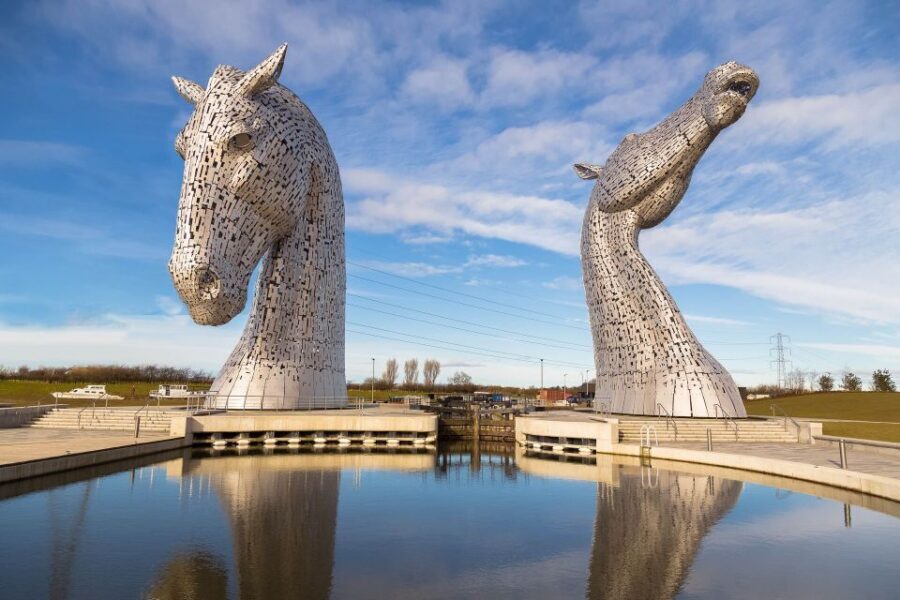
- 30-metre Kelpies: massive steel horse-head sculptures for photos and myth-bites
- Balmaha stretch: about an hour where you can pause, take in Loch Lomond, and spot Ben Lomond
- Stirling Castle focus: views from Castle Hill plus stories tied to Wallace and Robert the Bruce
- English live guide + audio options: downloadable audio guides in multiple languages (headset needed)
- Coach comfort matters: a long day on the bus means you’ll want comfortable clothes and shoes
From Edinburgh to The Kelpies: 30 Metres of Steel Horses
This tour is built like a good road movie: you leave Edinburgh early, head west, and hit your first wow moment fast. The bus ride is about 45 minutes, which keeps the day moving without feeling like you’re committing to an all-day transfer.
When you reach The Kelpies, you’re looking at the world-famous horse-head sculptures, towering at 30 metres and made from 300 tonnes of steel. Even if you’re not usually a sculpture person, you can’t miss the scale. This is the sort of stop where you’ll want a couple angles: front-on for the classic “giant horse head” look, and side views where the metal shape and water-themed styling make more sense.
You’ll get around 30 minutes here for photos and a visit. That’s not a long time, but it’s usually enough to do what you came for: get your best shot, walk in the viewing area, and read a few of the “why does this exist” details. It’s also a great reset after morning travel, because the site is outdoors and you can move at your own pace.
If you care about photos, wear shoes that are steady on uneven ground. And bring a camera strap or a secure pocket for your phone, since you’ll likely be moving around quickly to get the angle before other groups shift positions.
You can also read our reviews of more tours and experiences in Edinburgh.

Balmaha and Ben Lomond Views: A Quick Loch Lomond Reset
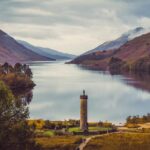
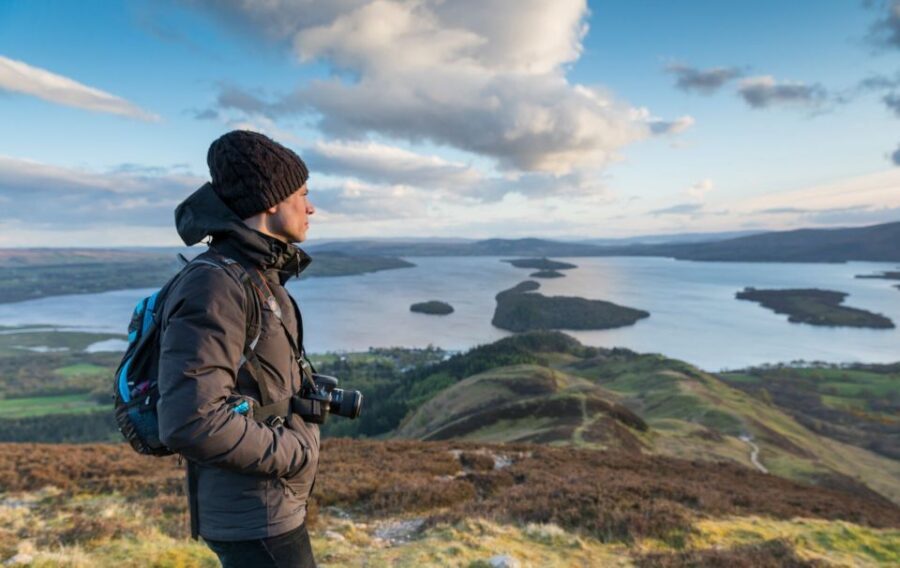
Next comes Loch Lomond and a stop at Balmaha. This is where the day turns from “iconic photo” to “walk around and breathe.” You’ll have about 1 hour for Balmaha: free time, sightseeing, and a chance to stretch your legs.
Balmaha is a small, scenic base on the loch. Even with only an hour, it helps you feel the character of the area. Expect water views, nearby hills, and that fresh Highland air effect that hits fast when you’re used to city mornings. If you’re the type who likes to look for perspective cues—what’s near, what’s far, how the loch bends—this stop gives you enough time to do that without rushing.
You’ll also have the chance to admire Ben Lomond, described in your tour material as Scotland’s most southerly munro. I like that this detail is pointed out because it helps you connect what you’re seeing to a bigger idea: the hills here are part of the culture, not just the scenery.
Here’s the main trade-off: 1 hour is short, and one of the big frustrations people report with Loch Lomond is not having enough time to reach deeper viewpoints. So if your dream is a long walk with maximum views, treat this as a tasting menu. You’ll leave with a sense of place, but you won’t get a full hiking day.
Practical move: bring a light layer even if Edinburgh felt mild. Loch areas can get windier, and you’ll be standing around waiting for the group occasionally.
Stirling Town Time: Where You Can Set Your Own Pace
After Loch Lomond, the tour shifts to Stirling, and you get a longer block of time: about 2.5 hours for free time and sightseeing.
This matters because Stirling isn’t just a stop to pass through. It’s a real town base with streets that let you slow down. You can do the essentials: find a coffee, do a short wander, and get oriented for the castle visit later. If you want to plan ahead, this is also the time to decide where you’ll spend your energy when the castle time comes. You can’t do everything, so choose one or two priorities.
One caution based on how these kinds of days run: the time gets busy if you use it to squeeze in lots of extra sights. Since the castle visit is fixed later, use town time to prep rather than cram. I’d rather you spend your energy arriving at the castle with calm shoes and a clear head than sprinting around Stirling and feeling worn out.
Also, if you’re traveling with someone who likes museums and someone who likes street time, this split is a nice compromise. The tour guide handles the main history stops, and you still get room to customize the rest.
Stirling Castle: Royal Drama and Wars of Independence Stories
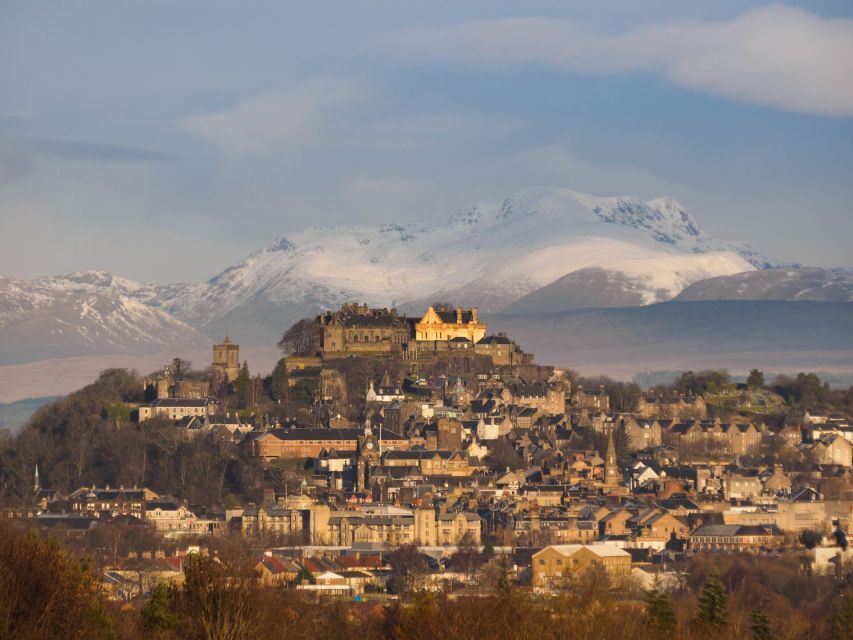
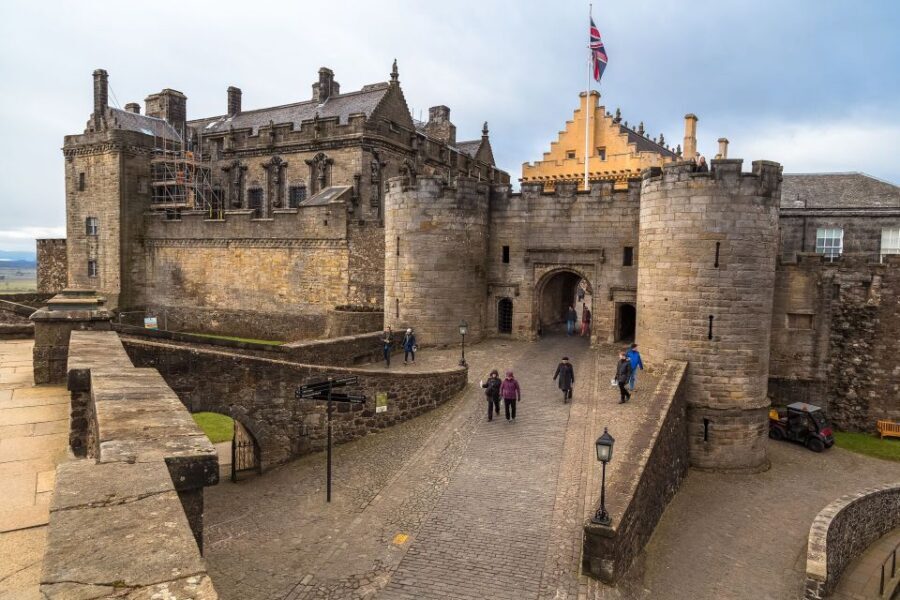
The heart of the afternoon is Stirling Castle, which sits high on Castle Hill. That position is part of the experience: you don’t just visit the building, you also get the surrounding views that make you understand why this site mattered so much.
Your tour visit is guided, and the stories focus on major events in British history, especially the Wars of Independence, including connections to William Wallace and Robert the Bruce. When a site is this layered, the guide’s job is to turn facts into a narrative you can remember. I like when a castle tour doesn’t just list rooms. It explains why each area mattered and how power changed hands.
The castle also gives you that “pause and look” moment that many people want from Scotland: standing somewhere elevated, seeing how the land works, and realizing you’re looking at the same sort of vantage points people fought for. Even if you’re not a hardcore history person, it clicks because the setting is doing part of the storytelling for you.
One more practical point: castle visits take walking and standing. Wear comfortable shoes and plan for a slow pace inside. If you get tired easily, you’ll still be able to enjoy it, but you’ll want to move thoughtfully rather than trying to beat the crowd.
If you’re someone who likes guided history, you’ll likely appreciate that the tour doesn’t leave Stirling as just a photo stop. You get a guided visit with time for your own wandering too.
Guide, Audio Guides, and Coach Comfort on a Long Day
This is a 9-hour day trip built around a coach schedule, with a live English guide and downloadable audio guides in Chinese, English, Spanish, French, Portuguese, German, and Italian.
Here’s how that helps you: if you want the live narrative in English, you can follow it live. If you want extra detail or want to switch languages, the audio guides can support you—assuming you have the right gear. The tour material specifically notes that you should bring a headset if you’re using an audio guide.
I also like that the audio options cover multiple languages, because Stirling and the castle story can be easier when you can choose how you process it. Just don’t assume the live guide will speak your language, because the live tour guide is listed as English.
Now, coach comfort. The day is long enough that seating quality matters, and at least one person in the feedback described the bus as uncomfortable with very small seats. I can’t tell you which bus you’ll get, but you can protect yourself: wear breathable clothes, bring a small pillow if you use one, and do a quick ankle-and-shoulder stretch during stops if you feel stiff.
Also keep these rules in mind for an easy ride: no smoking on the vehicle, no alcohol or drugs, and no unaccompanied minors. There’s also a limit on luggage: one suitcase up to 15 kg (33 lb) plus one carry-on per traveler.
If you’re sensitive to language mismatch, treat this as an “English live guide” tour first. Even with audio in other languages, the live pacing and Q&A—if any—will be in English.


Price and Value: What $55 Gets You (and What It Doesn’t)
At $55 per person, this tour is priced like a classic big-sights day trip from Edinburgh: transport, a live guide, and the included audio guides. It’s not just a bus ride to places; you’re paying for interpretation and timing.
The catch is what’s not included. Entrance fees are not included, and meals and drinks are not included either. So your day’s final cost depends on whether you’ll pay for castle entry during the tour visit and what you spend on food along the way.
That said, the value can still be strong if you’re hitting all three major anchors in one day:
- The Kelpies for a dramatic, unique sculpture stop
- Balmaha / Loch Lomond for views and a quick taste of the loch region
- Stirling Castle for a guided, story-driven visit tied to major historical moments
You’re paying for convenience. If you tried to stitch this together yourself, you’d likely spend time solving transport, parking, and pacing across multiple stops. For many people, paying for a scheduled day is worth it, especially when you’re short on time.
One scheduling note: return times are approximate and depend on weather and travel conditions. The tour advises leaving at least 3 hours for onward travel or reservations.
Timing and Order: The Day Moves Fast, So Plan Smart
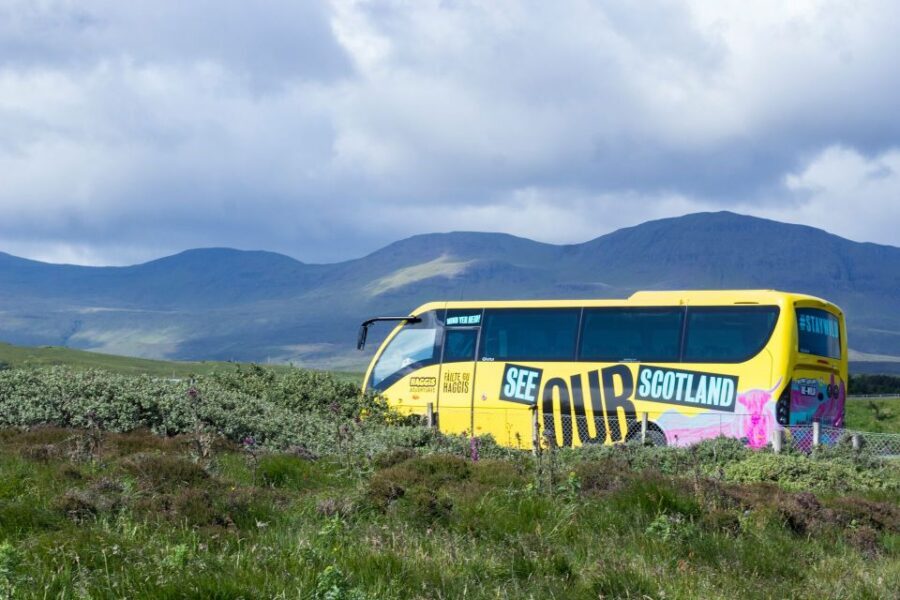
This trip is designed to move. It starts from Haggis Adventures and asks you to meet 15 minutes before departure to check in. The tour material also says late arrivals can’t be refunded and departure won’t be delayed.
There’s a departure timing change coming: from 1 April 2026, the tour departs at 9:00am. If you’re booking around then, double-check your start time.
The itinerary order may change. That’s normal for day trips, but it affects which photos you take first and what lighting you get. If photography matters, arrive early to check where the day begins and keep your “must-shoot” priorities flexible.
Also, the tour may operate with a sister company, Highland Explorer Tours. Functionally, that’s still the same general experience, but it’s another reason to be ready for slight differences in how the day feels.
Who This Tour Suits Best (and Who Should Skip It)
This tour is a great fit if you want a structured day with major hits and you don’t want to plan transport between Edinburgh, Loch Lomond, and Stirling. I’d also recommend it if you like history that’s guided and story-based, because Stirling Castle is the anchor and it’s given real time and interpretation.
You’ll likely be happiest if:
- You’re comfortable with a coach day and lots of moving between stops
- You enjoy quick but meaningful sightseeing windows
- You want The Kelpies plus Stirling Castle in the same day
- You can handle Loch Lomond as a view-and-stroll stop, not a hiking full-day
You might want a different plan if:
- You’re hoping to do longer hikes at Loch Lomond from Balmaha
- You expect a live guide in a language other than English
- You need extra flexibility for mobility needs, since the tour is listed as not suitable for wheelchair users (with the note that collapsible wheelchairs are allowed if you have someone to assist you with boarding)
Should You Book This Edinburgh to Kelpies, Loch Lomond, and Stirling Castle Tour?
Book it if you want a high-impact day: The Kelpies, Loch Lomond views, and Stirling Castle all handled in one go. At $55, the value is strongest when you treat entrance and meals as extras and focus on what’s included: transport, a guide, and audio options.
Skip or adjust your expectations if Loch Lomond is your main goal. Plan to leave with memories of water and hills, not the satisfaction of a long hike. And if language is important to you, remember this is an English live guide tour, with multilingual audio support that needs a headset.
If you’re the kind of traveler who likes to see big icons without spending your whole day figuring out logistics, this one is a solid choice for an Edinburgh base.
FAQ
How long is the tour?
The tour duration is 9 hours.
Where does the tour start and what time should I arrive?
You meet at Haggis Adventures and should arrive 15 minutes before departure for check-in. From 1 April 2026, the departure time is 9:00am.
Are entrance fees included?
No. Entrance fees are not included.
Is transportation included?
Yes. The tour includes transportation by bus/coach.
Are audio guides included, and what languages are available?
Yes. Downloadable foreign language audio guides are included, in Chinese, English, Spanish, French, Portuguese, German, and Italian. If you use the audio guide, bring a headset.
Do I need to bring a lunch?
Meals and drinks are not included, so you should plan for food on your own during the free time.
Is hotel pickup and drop-off included?
No. Hotel pickup and drop-off are not included, so you’ll need to organize transport to the departure point in advance.