REVIEW · LONDON
Night Photography Tour in London
Book on GetYourGuide →Operated by 11252821 · Bookable on GetYourGuide
London at night is pure photo fuel. This tour turns that glow into usable skills and great shots. You’ll work with a professional guide on the best London night compositions, and you’ll cross the Thames for reflections that can look almost cinematic. I especially like the personal coaching that fits your skill level, whether you’re using a DSLR, mirrorless, or just your phone. The only real catch: you’ll need a tripod (you can hire one if you don’t have one), and night shooting is easier when you arrive ready.
Here’s the deal: you get a structured 2.5-hour route built around iconic sights, plus hands-on guidance so you’re not just standing in the dark hoping for the best. The stops are timed for actual shooting, not endless sightseeing talk. One thing to consider is that the tour is focused on photography time at each location, so if you’re mainly looking for a deep historical walk-through, you might want a more general city tour too.
In This Review
- Key things to know before you go
- The vibe: learning night photography without the chaos
- Where you start near Westminster station
- Stop 1: London Eye—45 minutes of classic night geometry
- Stop 2: St Paul’s Cathedral—work the light, not just the silhouette
- Stop 3: Tower Bridge—your final photo moments
- Crossing the Thames: why the walk matters for your photos
- Photography coaching that actually helps you shoot on your level
- Tripod requirement: the make-or-break detail
- How long is it, and how much photography time you really get
- Price and value: $282.87 per group up to 5
- Who should book this night photography tour
- Tips to get better fast before the first stop
- Should you book this night photography tour?
- FAQ
- Do I need a tripod for this London night photography tour?
- What cameras and phones is the tour suitable for?
- How long is the tour?
- Where does the tour start and where does it end?
- What landmarks do you photograph?
- Is the tour private?
- Will I get extra help after the tour?
Key things to know before you go
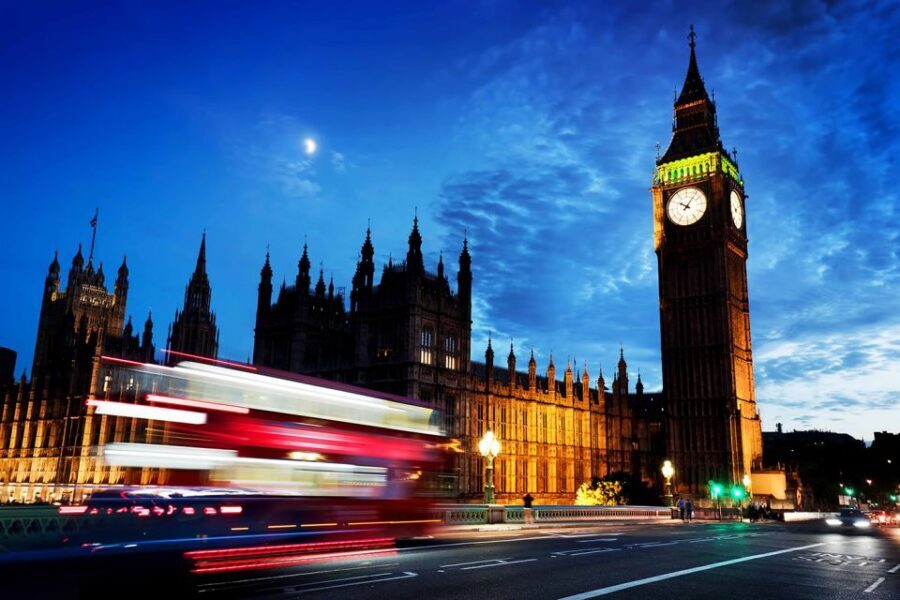
- Pro guidance for low light and long exposure so you can stop guessing and start getting results
- Thames north and south bank photo stops built around reflections and city lights
- Iconic landmarks in a tight route including London Eye, St Paul’s, and Tower Bridge
- Works with DSLR, mirrorless, and smartphones with advice tailored to what you’re using
- You’ll end at Tower Bridge after the final photo stop and a return route to the start area
The vibe: learning night photography without the chaos
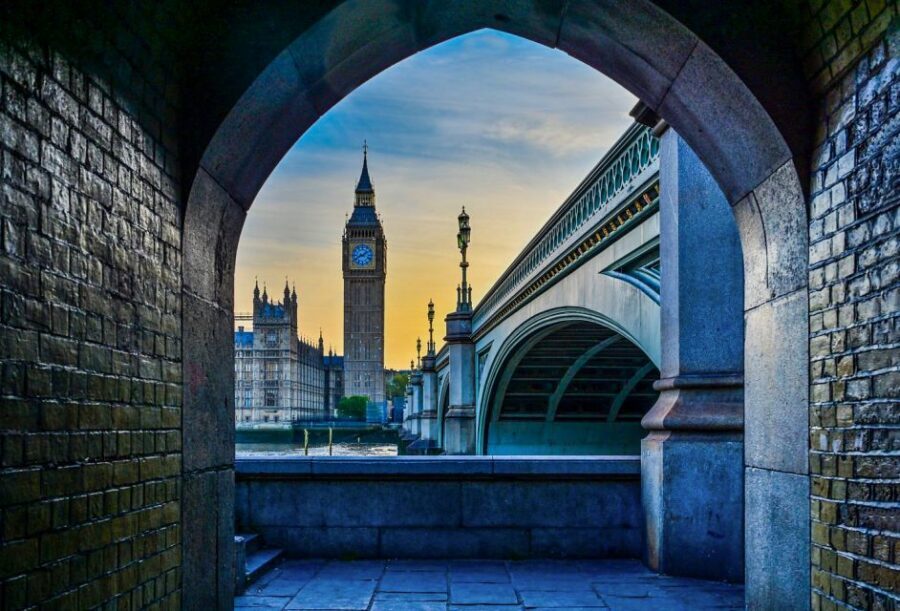
Night photography in London is one of those situations where the city helps you… and also tricks you. Streetlights are bright. Signs are everywhere. Reflections on the Thames are gorgeous. Then you try to take a photo and suddenly everything is blurry, overexposed, or weirdly flat.
This tour is designed to fix that problem fast. You’re not just being shown spots—you’re getting instructions that connect directly to what you’re aiming at: how to shoot in low light, how to handle long exposures, and how to compose around landmark lighting rather than against it.
The best part is that you’re working with a guide who can coach you in real time. In the short time you’re out, that coaching matters more than spending hours watching tutorials. And the route is practical: it moves you through multiple iconic views of the Thames so you can compare settings and results.
Also, you’ll get an e-guidebook after the tour, which is helpful because night photography is one of those skills you improve by repeating the same moves at the next opportunity.
You can also read our reviews of more evening experiences in London
Where you start near Westminster station
The tour meets outside Caffè Nero by Westminster station. That’s a smart choice. You’re near major transit lines, and you can grab a quick drink beforehand without turning the whole outing into a logistics puzzle.
From there, you’ll head into the photo route with the guide setting the pace. Because you’re focusing on night shots, the first few minutes are the moment to get your gear ready: confirm your phone camera mode or your DSLR/mirrorless settings, check you have charged batteries, and set up so you’re not fumbling later.
One more practical note: the tour is a private group and the price is listed per group up to 5. That usually means less time waiting around and more time getting direct feedback.
Stop 1: London Eye—45 minutes of classic night geometry
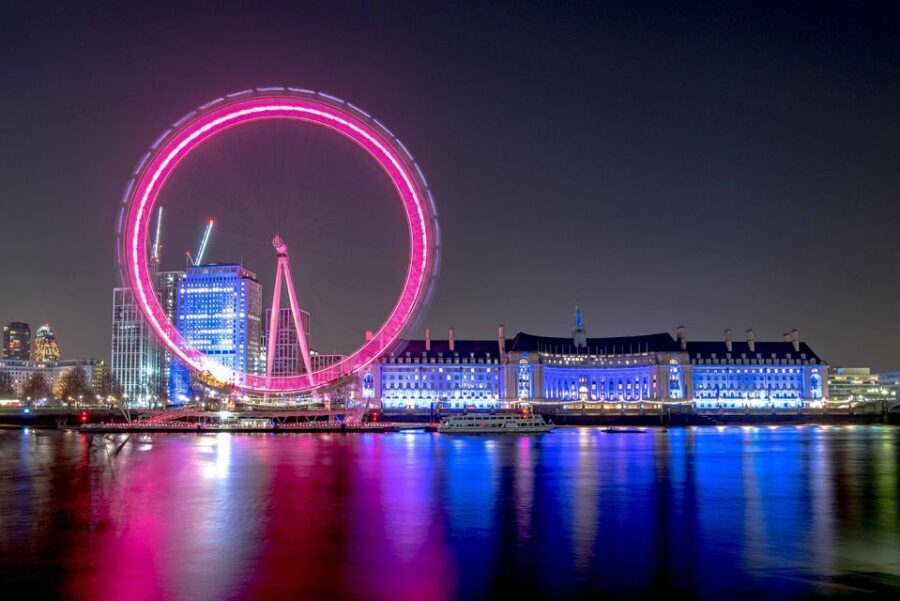
The London Eye is one of the easiest places to start because it has clear lines, bright illumination, and enough surrounding light to build strong compositions. Your guide will help you think about what makes a good night photo here: not just capturing the landmark, but using the lighting patterns and spacing to make the shot feel intentional.
You’ll have 45 minutes for a photo stop and this matters. At night, you often need extra time just to experiment:
- Try one composition with the Eye dominant and the walkway/nearby lights supporting it
- Try another with longer exposure to smooth water-like reflections and emphasize glow
- Use your tripod to stabilize the frame so your long exposure doesn’t turn into a soft blur
You can use a DSLR, mirrorless camera, or smartphone. The guide’s coaching is built for that reality, including advice for low light and longer shutter times—two things that can dramatically change how bright the London Eye looks in your final image.
If you want a quick takeaway: use the Eye to practice getting proper exposure while keeping highlights controlled. It’s bright, and that’s a good teacher.
Stop 2: St Paul’s Cathedral—work the light, not just the silhouette
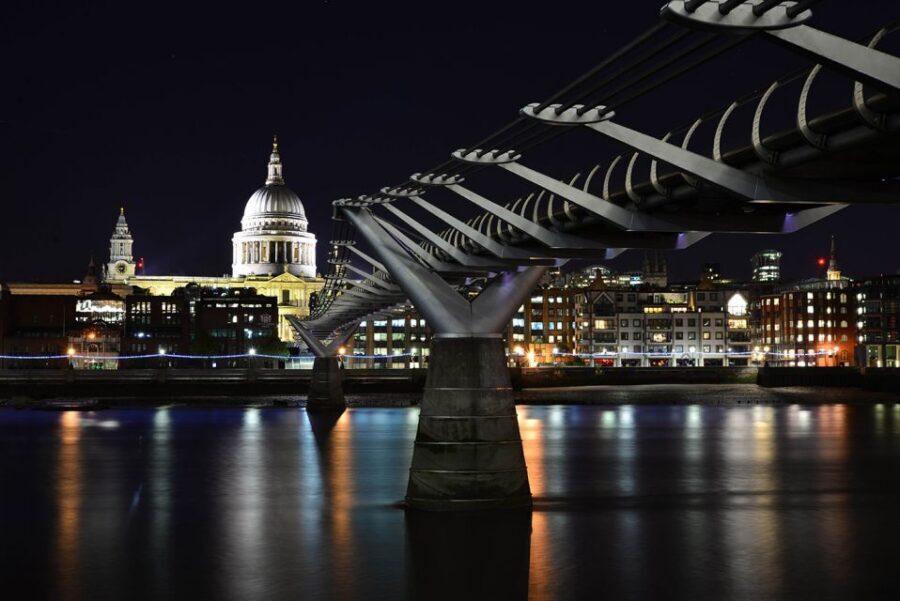
St Paul’s Cathedral is the second major stop, again with 45 minutes built in for photography. This is where the tour shifts from “cool landmark” to “make the photo look like you planned it.”
St Paul’s at night gives you structure: a big shape, recognizable angles, and lighting that can create contrast with the sky. The guide will help you decide how to frame it and what to do with the surrounding glow so the cathedral doesn’t get washed out.
One trick you’ll likely be coached on is using reflections and nearby light sources to add depth. When you’re near the Thames, you can build a shot that includes both the monument and its mirror image. That doubles your composition options, which is a big deal during a relatively short 2.5-hour tour.
Also, this is a good stop to practice your camera settings changes. Night photography rewards small adjustments:
- Lowering exposure when highlights clip
- Extending shutter time for a more dramatic, smooth light effect
- Adjusting focus so edges stay crisp
And if you’re using a smartphone, the guide can steer you toward workable low-light modes and stability habits so you’re not fighting the tiny shake that happens when you hold the phone in your hand.
Stop 3: Tower Bridge—your final photo moments
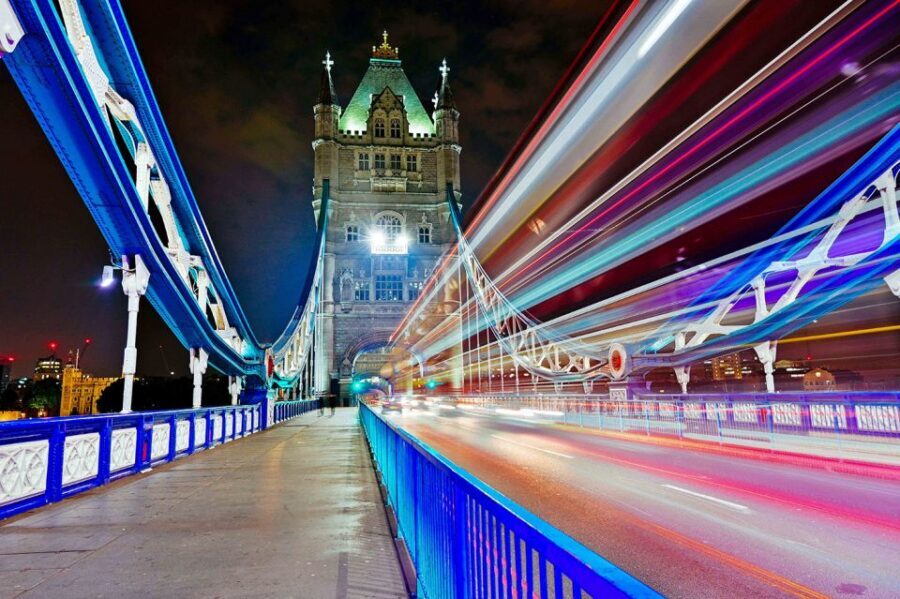
Tower Bridge is the endgame, with another 45-minute photo stop. By this stage, you’ve already made a few mistakes, learned what works, and likely figured out the settings that match your gear.
Tower Bridge at night is a gift to photographers: bright lighting, bold geometry, and a setting that naturally produces reflection shots. Plus, Tower Bridge is where the tour wraps, so you can spend time refining your best idea instead of rushing to finish.
Here’s where long exposure advice really pays off. With a tripod, you can create that classic nighttime look: lights stretch slightly, reflections become more controlled, and the whole scene feels more cohesive. Without a tripod, your long exposure efforts can turn into mush—so take the tripod requirement seriously.
If you don’t have one, you can hire the tour’s tripod for £30 for the duration of the tour. That’s a straightforward solution because borrowing a random tripod from a friend usually doesn’t match camera weight and stability needs. For night shooting, stability is half the battle.
You can also read our reviews of more photography tours in London


Crossing the Thames: why the walk matters for your photos
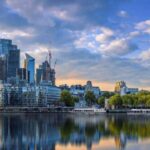
Between the major landmark stops, you’ll walk and explore along the north and south banks of the Thames. This isn’t just for getting from place to place. It changes the way light falls on your subject and how reflections show up.
When you move banks, you get different angles on the same skyline. That means you can create a small “before and after” comparison just by changing your position. In one direction you might get stronger reflections; in the other you might see more of the landmark’s lighting pattern with less glare.
You’ll also see moving elements that can add energy to photos, like double-decker buses and city traffic light trails. Whether you capture those as crisp night dots or more stretched streaks depends on your settings and how long your exposure is.
If you’re new to night photography, this walk is the fastest way to learn: you get multiple compositions in one outing and you’re coached at the exact moments you need the adjustment.
Photography coaching that actually helps you shoot on your level
One of the most practical things about this tour is that it’s aimed at all types of digital cameras and smartphones. The guide gives expert advice on both the creative side (composition) and the technical side (exposure and long exposure).
From the reviews and the tour approach, one theme pops: the guides are patient and focused on learning. For example, the name David comes up in a glowing review where the guide is praised for being very patient and helping both camera users and iPhone shooters learn how to make better images.
That kind of mindset matters. Night photography can make you feel incompetent quickly—your settings look right, and the photo still comes out wrong. A patient coach helps you isolate the problem.
What you’ll likely practice during the tour:
- How to keep the frame steady on a tripod
- How to handle low light without turning everything into noise
- How to use longer exposures for smoother light and stronger nighttime mood
- How to adjust for your device (camera vs smartphone)
The e-guidebook after the tour extends that learning. It’s the difference between seeing one great photo and actually leveling up for your next London night.
Tripod requirement: the make-or-break detail
You’ll need a tripod. That’s not a small requirement, and it’s why this tour is built to teach long exposure techniques properly.
If you already own a tripod: bring it. If you don’t, you can hire one for £30 for the duration of the tour. The hire option is especially valuable if you’re only in London for a short time and don’t want to drag extra gear.
Also, think about how you’ll carry it. A tripod is bulky in transit. If you plan to use the subway a lot, consider how you’ll keep it stable and manageable while walking.
How long is it, and how much photography time you really get
The tour is 2.5 hours total. That’s a sweet spot: long enough for meaningful coaching and multiple landmark shots, but not so long you burn out in cold night air.
Each main stop is scheduled for about 45 minutes, which is generous for night work. At night, you don’t just point and shoot once. You experiment. You correct. You try a different angle. You wait for the lighting to look right again.
The route also ends at Tower Bridge, with the tour described as returning to the start point. In practical terms, it means you’ll finish the big final photo session near Tower Bridge and your guide handles the rest so you aren’t left figuring out how to get back alone.
Price and value: $282.87 per group up to 5
At $282.87 per group up to 5, the price is best understood as “per group skill boost,” not “per person entertainment.” If you split the group, your per-person cost drops fast, and you gain a lot of attention.
This is where the value shows up:
- You’re not paying just for sightseeing. You’re paying for a professional photographer guide.
- You get guidance for your specific gear (DSLR, mirrorless, or smartphone).
- You receive ongoing learning support through the e-guidebook after the tour.
- The tour includes the key technical focus—low-light and long exposure—where solo practice is slower and more frustrating.
If you’re traveling with someone who’s also eager to take photos, booking as a small group makes even more sense. If you’re traveling solo, it can still be worth it because the guide can tailor advice to your questions, and you’ll benefit from learning a repeatable method rather than just copying one-shot camera settings.
Who should book this night photography tour
This tour is a strong fit if:
- You want to photograph London at night but you’re stuck on exposure, blur, or highlight issues
- You want coaching that applies to your gear, not generic tips
- You enjoy shooting reflections along the Thames and learning composition with landmark lighting
- You want a short, focused outing that still feels like real progress
It’s less ideal if your top priority is purely historical narration or long scenic wandering. This trip is built for making photos, not for covering every fact about London’s monuments.
Tips to get better fast before the first stop
You don’t need to be an expert. You just need to come prepared to test and learn. Here are a few practical things that help immediately during night shooting:
- Bring your tripod (or plan on hiring one for £30)
- Charge your battery fully before you go. Night plus cold drains power faster
- Clear space on your phone or memory card so you can shoot without panic
- Think about one goal for the night: crisp landmark + reflection, or longer exposure glow, or a smartphone-friendly shot you can repeat later
And when the guide is explaining a setting, try it right away. Night photography works best when you connect instruction to immediate results at the next angle.
Should you book this night photography tour?
If you want London night photos that look like you knew what you were doing, book it. The combination of landmark-focused stops, the Thames walking route, and hands-on coaching for low light and long exposure makes this a practical learning experience. The fact that it works with both cameras and smartphones—and that guides are praised for patience—also makes it a smart choice for beginners who don’t want a complicated workshop vibe.
Skip it only if you hate using a tripod, or if you’re mainly after general sightseeing with a photo bonus. For serious night photography progress in a short window, this is one of the more sensible ways to spend your time.
FAQ
Do I need a tripod for this London night photography tour?
Yes. The tour requires a tripod. If you don’t have one, you can hire the tour’s tripod for £30 for the duration of the tour.
What cameras and phones is the tour suitable for?
It’s suitable for all types of digital cameras, including DSLRs, mirrorless cameras, and smartphones, and the guide provides advice for using your device in low light.
How long is the tour?
The tour lasts about 2.5 hours.
Where does the tour start and where does it end?
The tour starts outside Caffè Nero, Westminster station. It ends back at the meeting point, with the final photo stop at Tower Bridge.
What landmarks do you photograph?
You’ll have photo stops around the London Eye, St Paul’s Cathedral, and Tower Bridge.
Is the tour private?
Yes. It’s a private group.
Will I get extra help after the tour?
Yes. You’ll receive an e-guidebook after the tour to help you keep improving.